
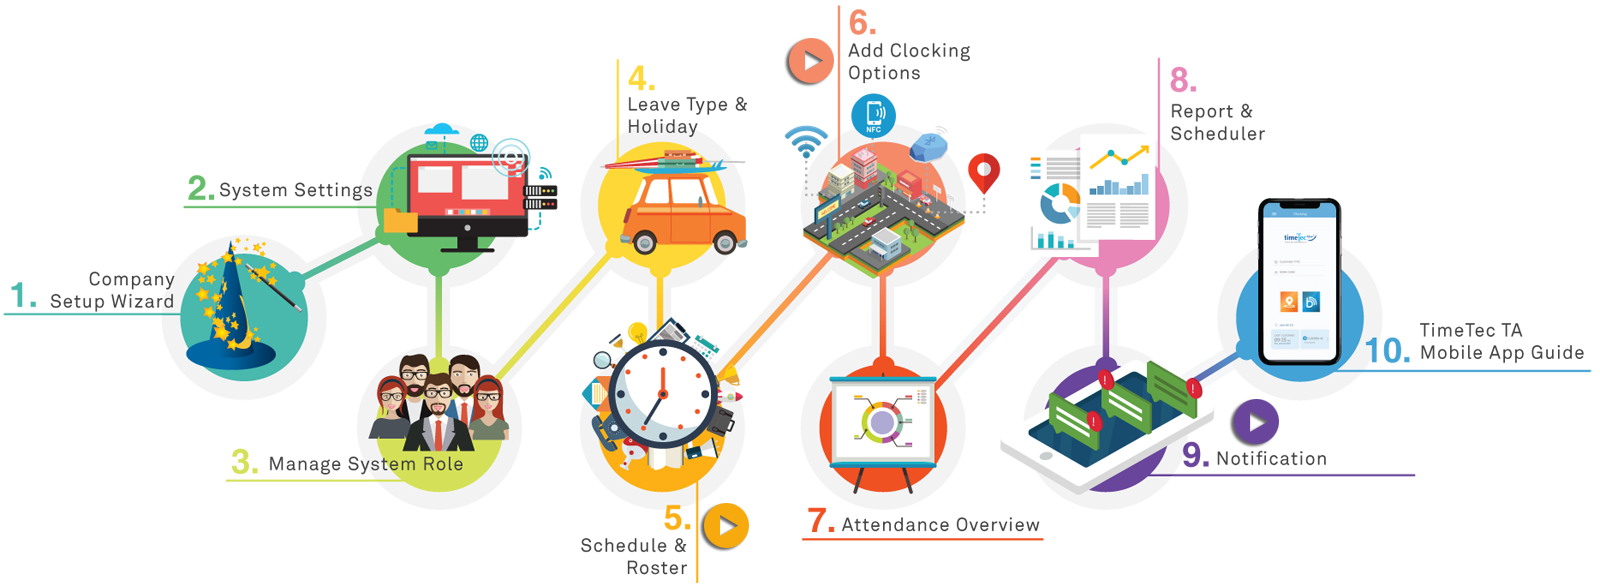
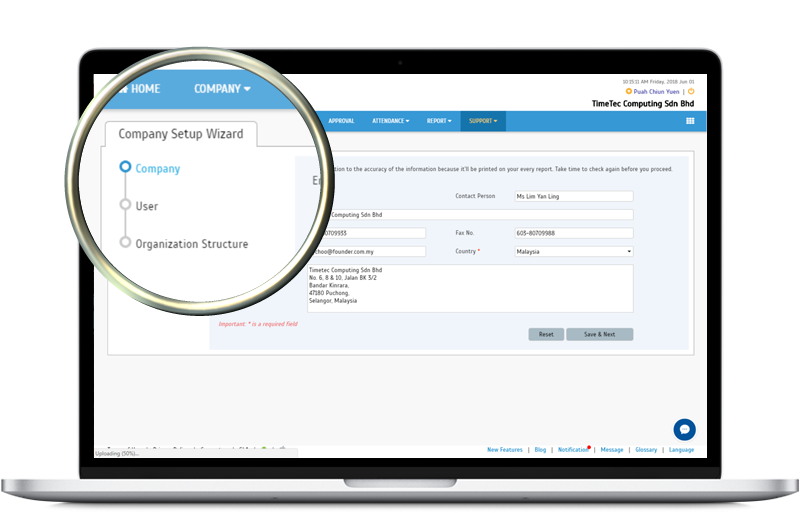
| Step 1 |
| Company Setup Wizard |
| This wizard will guide you on the basics of your TimeTec Attendance account: |
|
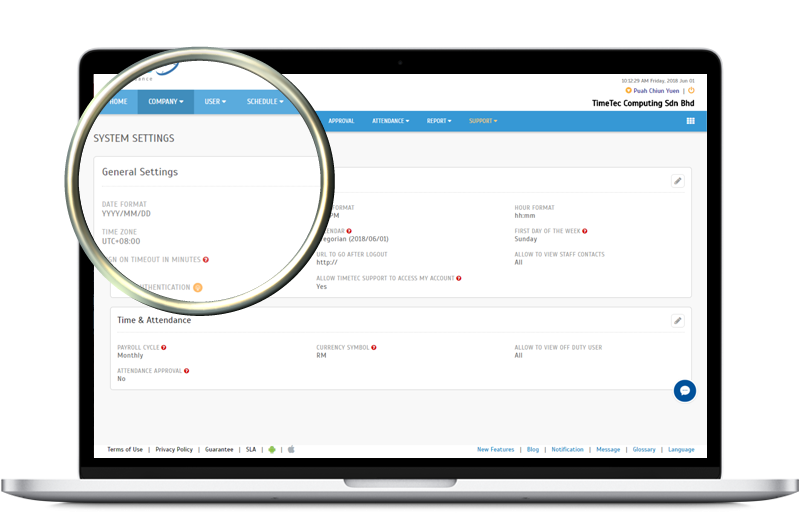
| Step 2 |
| System Settings |
| Company > System Settings |
|
GENERAL SETTINGS Set your preferred Date Format, Time Format, Time Zone and etc within this section before using the system.
TIME & ATTENDANCE |
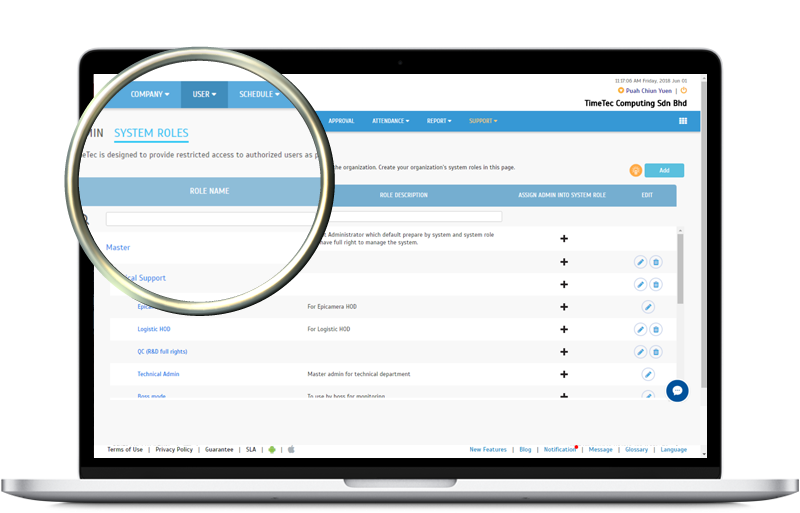
| Step 3 |
| System Roles |
| User > Manage System Roles & Admin |
|
Create various System Roles and assign them to different Admins. For example, HR Clerks are only allowed to View Attendance and Generate Report while the CEO has Master Admin rights to view and edit the data within the system. |
| Click Here For More Tips |
| Step 4 |
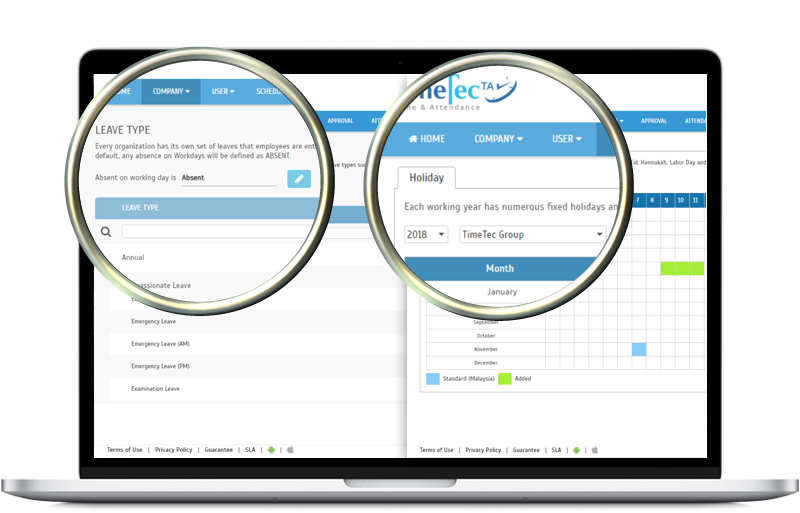
| Leave Type |
| Company > Leave Type |
| Add Leave Type and assign it to users in Customized User Duty Roster or Attendance when users take leave. |
| Holiday |
| Schedule > Holiday |
| Establish Holiday for the whole organization or even specific organization structure. Click Import Holiday to automatically import holidays for every country. |
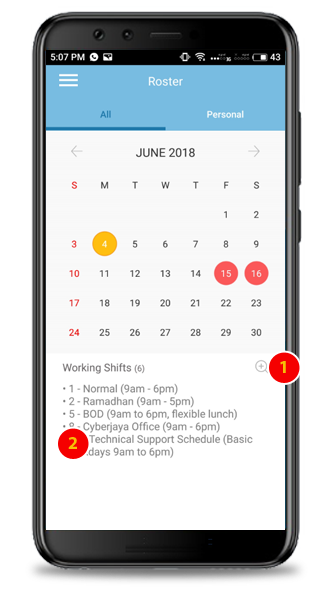
| Step 5 |
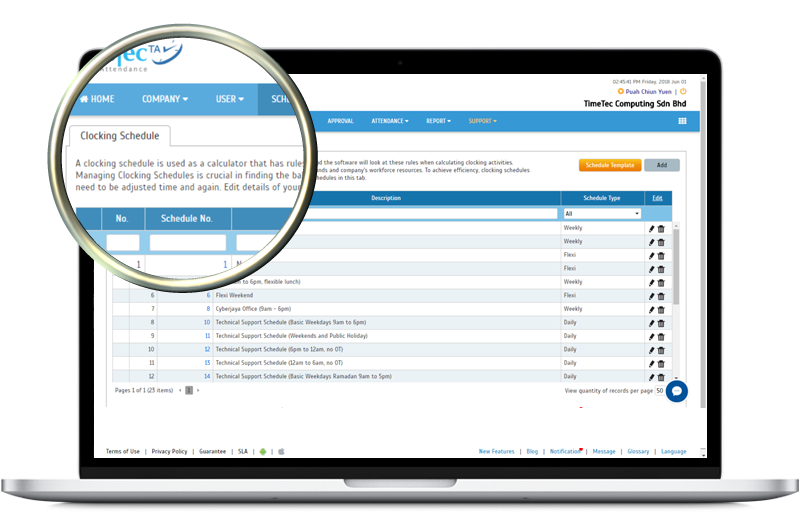
| Schedule & Roster |
| Step 5.1 |
| Create Clocking Schedule |
| Click here for tips |
| Step 5.2 |
| Assign Schedules & Users into Roster |
| Click here for tips |
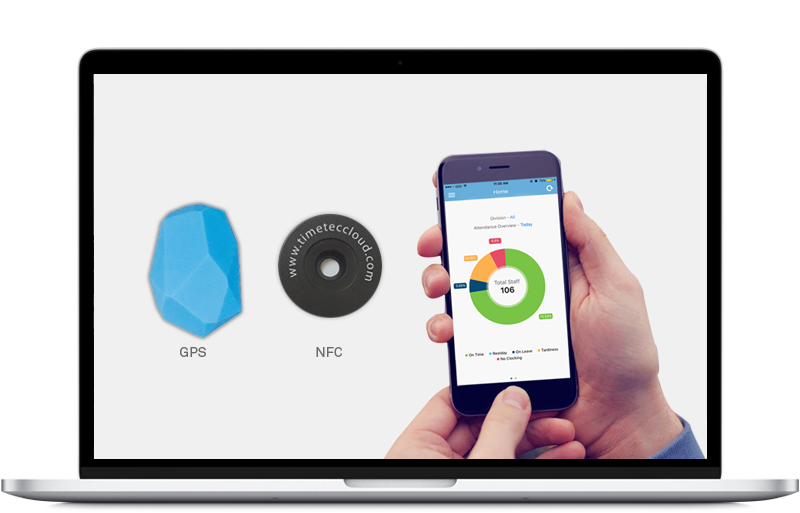
| Step 6.1 | |||||
| Add Clocking Option - NFC & Beacon | |||||
| Device > Mobile Clocking > NFC | Beacon | |||||
|
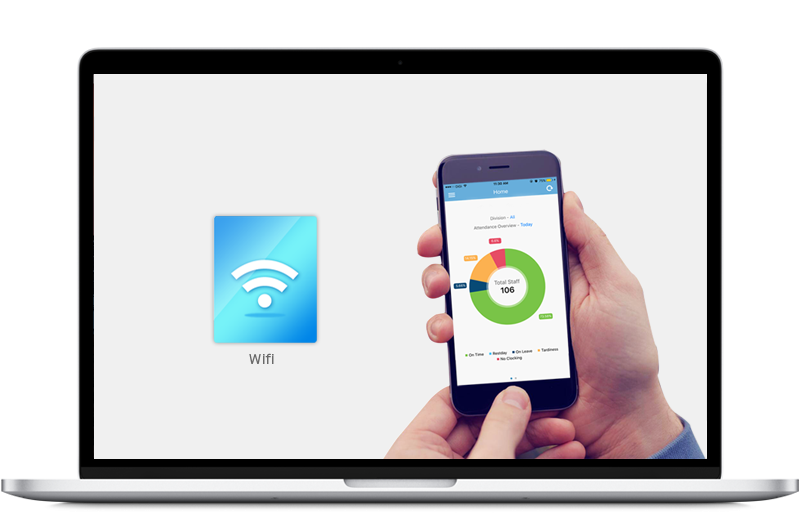
| Step 6.2 |
| Add Clocking Option - Wifi |
| Device > Mobile Clocking > Wifi Access Point |
|
| Learn More |
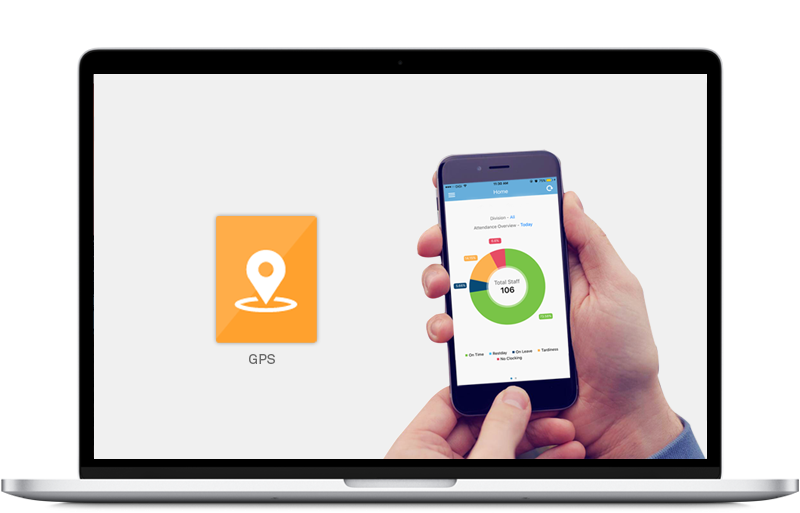
| Step 6.3 |
| Add Clocking Option - GPS |
| Device > Assign User to Device |
|
| Additional Feature |
| Step 6.4.1 |
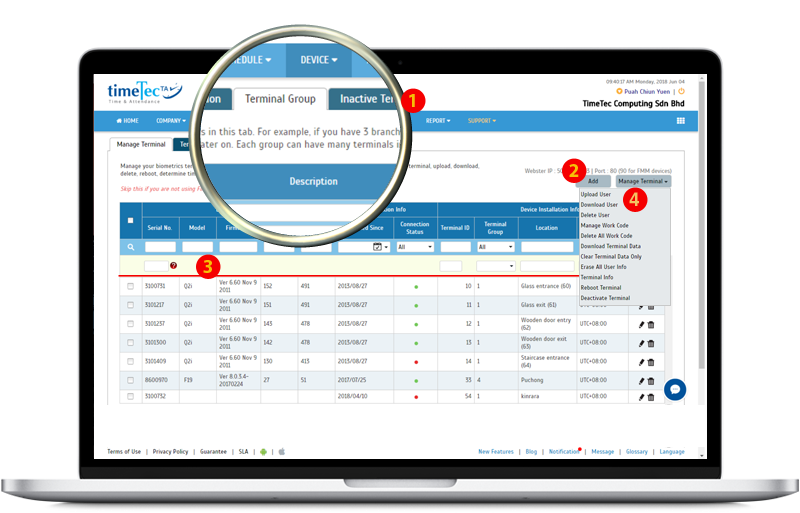
| Add Clocking Option - FingerTec Terminal |
| Device > FingerTec Terminal |
|
| Step 6.4.2 |
| Add Clocking Option - FingerTec Terminal |
| To upload users to FingerTec terminal: |
|
| To download users from FingerTec terminal: |
|
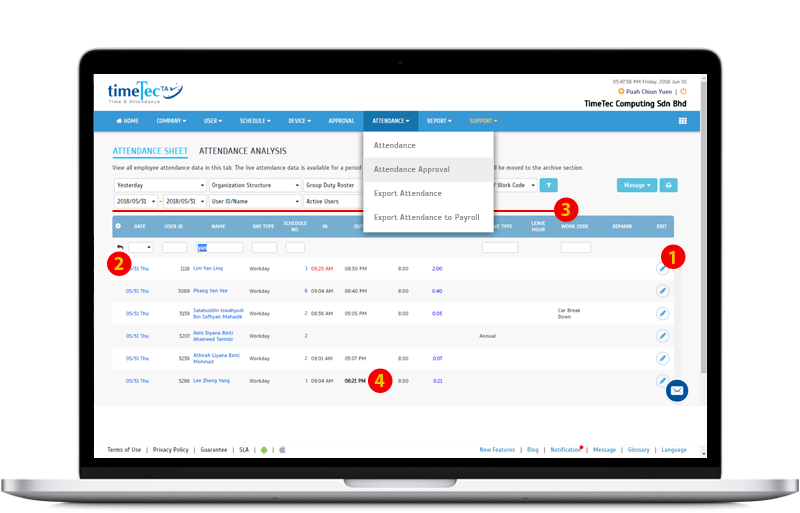
| Step 7 |
| Attendance Overview |
| Attendance > Attendance Sheet > Attendance Analysis |
|
| Additional Feature |
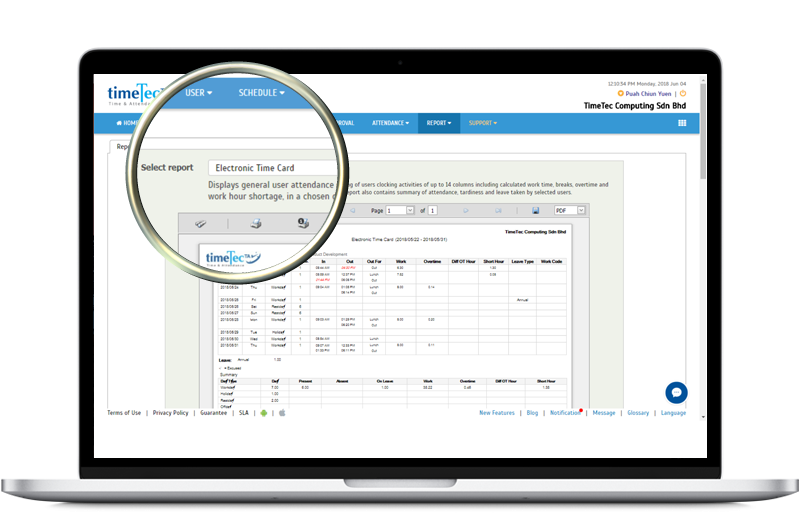
| Step 8.1 |
| Reports |
| Report > Attendance Listing > Electronic Time Card |
|
| Learn More |
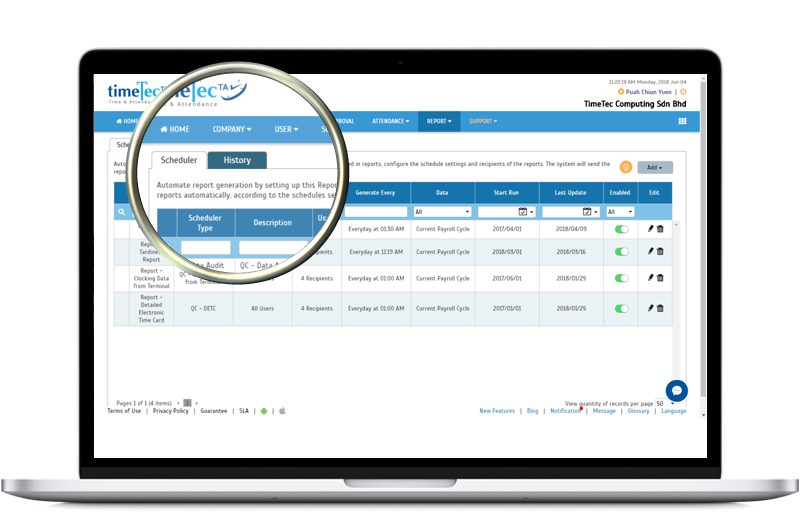
| Step 8.2 |
| Report Scheduler |
| Report > Scheduler |
| Automate report generation by setting up Report Scheduler for the system to automatically send reports to email addresses according to the specified schedules. |
| Learn More |
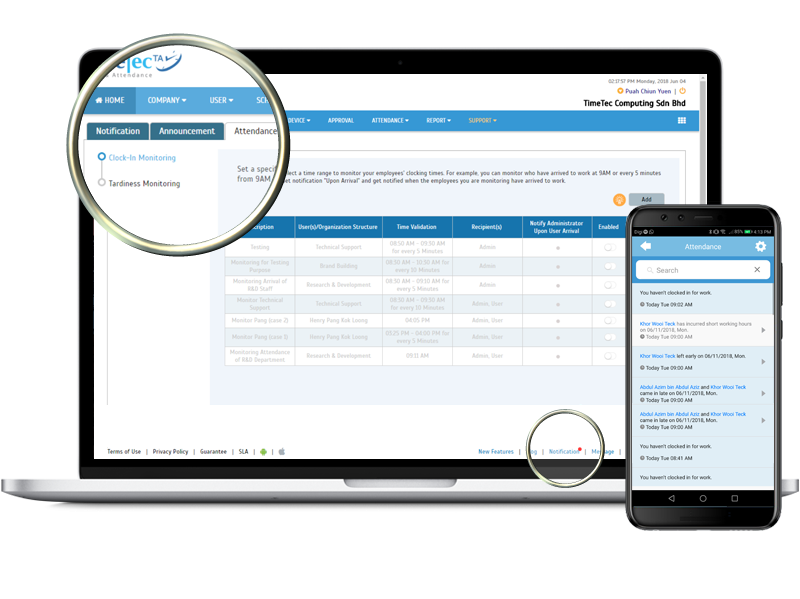
| Step 9.1 |
| Notification |
| Notification > Settings > Attendance > Clock-In Monitoring & Tardiness Monitoring |
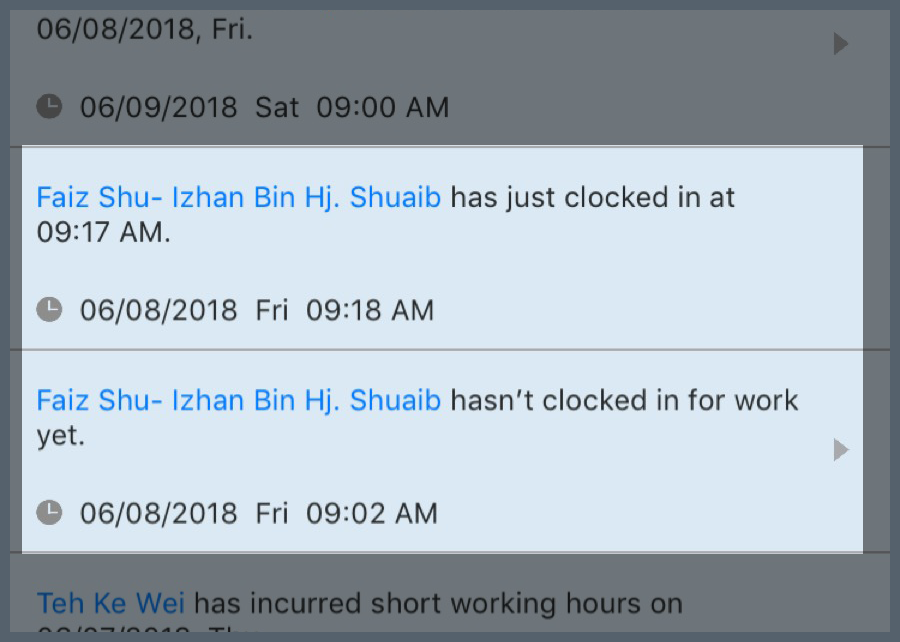
| Clock-In Monitoring |
|
| Step 9.2 |
| Notification |
| Notification > Settings > Attendance > Clock-In Monitoring & Tardiness Monitoring |
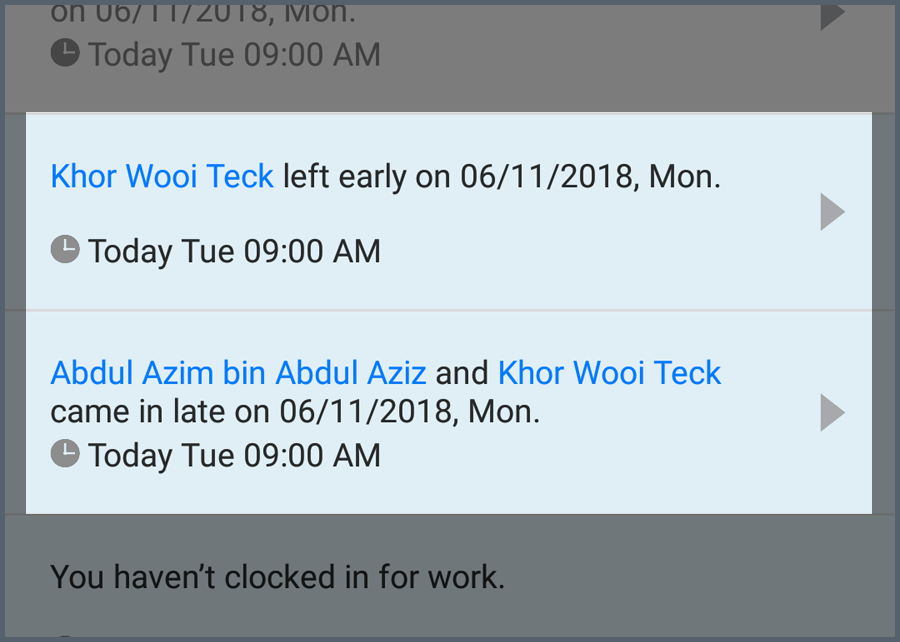
| Tardiness Monitoring |
|
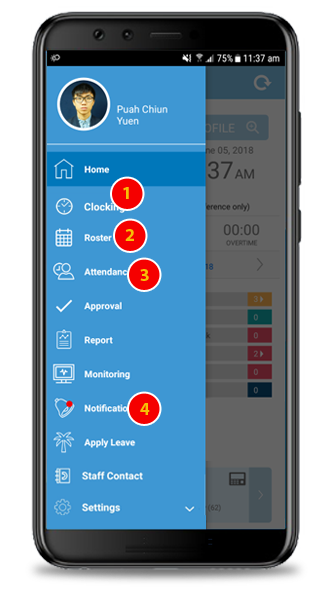
| Key Features |
|
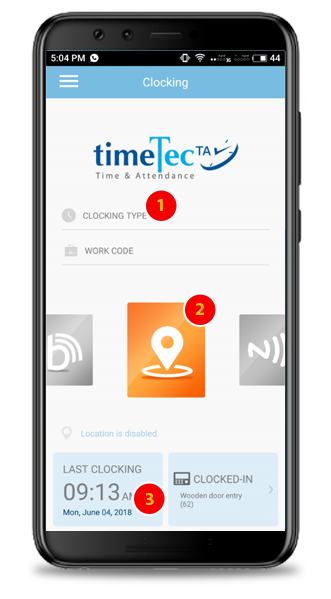
| Attendance Clocking |
|
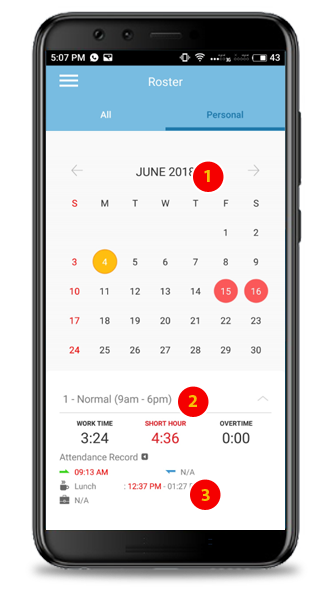
| View Roster |
|
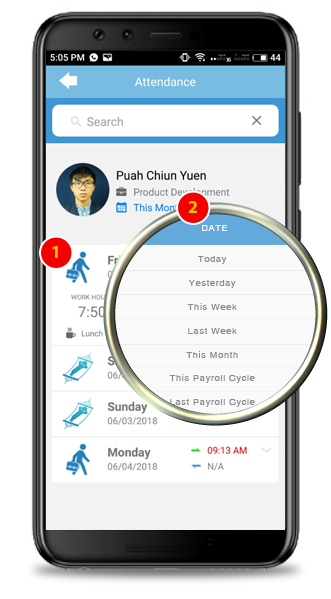
| View Attendance |
|
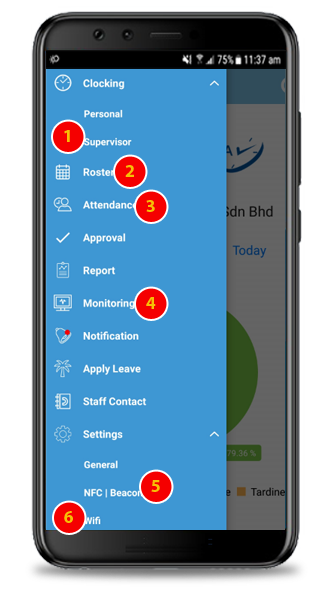
| Key Features |
|
| Supervisor Clocking |
|
| View Staff Roster |
|
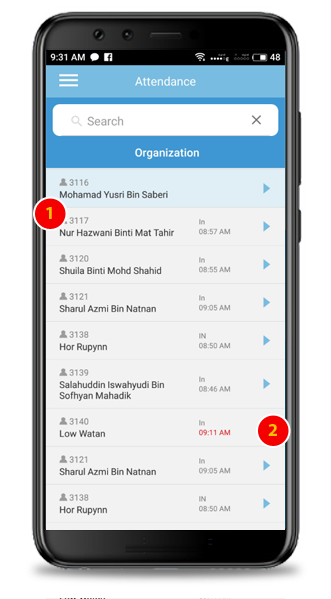
| View Staff Attendance |
|
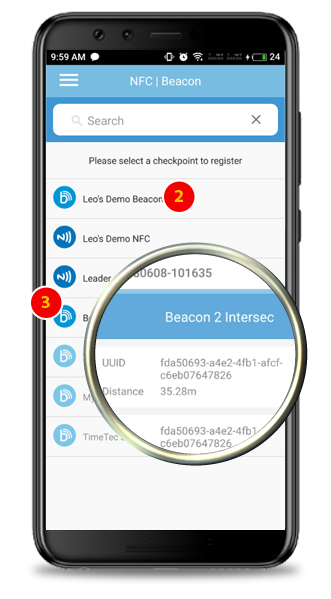
| Enroll Beacon Checkpoint |
|
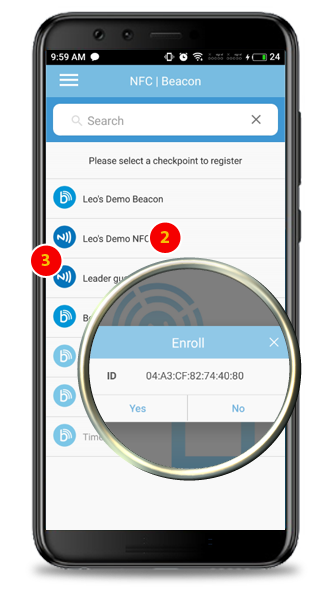
| Enroll NFC Checkpoint |
|
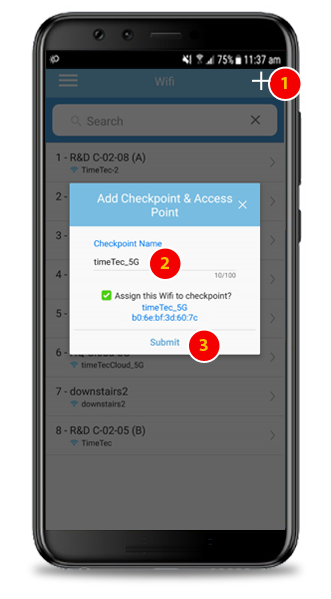
| Add Wifi Checkpoint |
|